>>
30-MINUTE MEALS! Get the email series now →


Golden, crunchy taquitos filled with creamy shredded chicken, perfect for weeknight dinners or a crowd-pleasing appetizer.

In my experience, this formula reliably wins over both kids and adults. I’ve served them at birthday gatherings and casual Sunday lunches; people always admire the crisp texture and the creamy, spiced filling. The combination of garlic, chili powder, and cumin gives a warm, familiar flavor without overpowering the chicken.
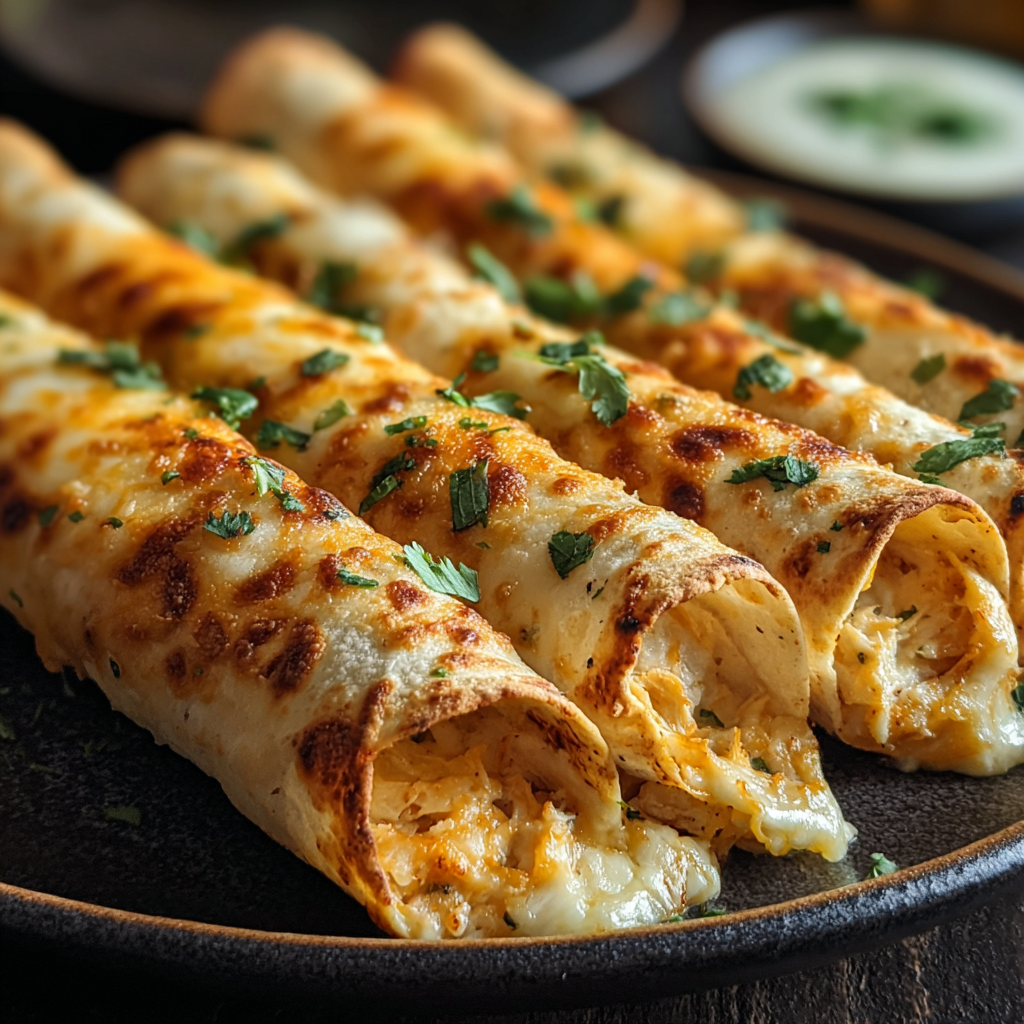
My favorite thing about these taquitos is how reliably they bring people together—whether they’re served as appetizers at a game night or as the main for a casual dinner. I’ve lost count of the times friends have requested the recipe after trying them warm from the oven; the crunchy shell and creamy inside deliver a satisfying contrast that never gets old. They’re simple enough for a busy evening yet elegant enough for a relaxed dinner party when paired with vibrant salsas and fresh garnishes.

Cool taquitos completely before storing to prevent condensation that makes the shells soggy. In the refrigerator, keep them in a single layer or separated by parchment in an airtight container for up to 3 days. For longer storage, freeze on a baking sheet until solid, then transfer to labeled freezer bags; they keep for about 3 months. Reheat refrigerated taquitos in a 375°F (190°C) oven for 8–10 minutes, or bake frozen taquitos at 400°F (200°C) for 12–18 minutes. Avoid the microwave for reheating unless you plan to crisp them briefly under a broiler or in a toaster oven afterward.
If you want a lighter version, substitute low-fat cream cheese and a reduced-fat cheese blend, though texture will be slightly less rich. For a vegetarian option, swap shredded chicken for 1 can (15 ounces) drained and mashed black beans mixed with 1/2 cup corn. Use corn tortillas for gluten-free guests—warm them to prevent splitting. If you prefer a smokier flavor, swap regular chili powder for chipotle powder (use half the amount) and add a teaspoon of smoked paprika. For extra creaminess, fold in 2 tablespoons of Greek yogurt at the end.
Plate taquitos on a large platter with small bowls of sour cream, guacamole, and salsa for dipping. Garnish with chopped cilantro, thinly sliced radishes for crunch, and lime wedges. Pair with a simple cabbage slaw tossed in lime vinaigrette to add brightness, or serve alongside a Mexican-style rice and refried beans for a heartier meal. For a party, accompany with pickled jalapeños and a smoky chipotle crema to offer contrasting flavors.
Taquitos, often associated with Mexican and Mexican-American street food, evolved as small rolled tacos that are fried until crispy. This baked adaptation leans on those traditional flavors—corn or flour tortilla, savory shredded meat, and bold spices—while offering a lighter, oven-crisped finish. Across regions there are variations: some use beef, others use cheese alone, and in many taquito stands you’ll find guisado-style fillings. The handheld nature of taquitos makes them a perfect example of food meant for sharing and casual eating.
In summer, swap in fresh corn kernels and diced heirloom tomatoes for a bright, sweet contrast. In cooler months, fold in roasted poblano peppers and caramelized onions to deepen the flavor. For holiday gatherings, add a pinch of cinnamon and cocoa powder to the spice mix for a subtle mole-inspired warmth. Garnish seasonally with pomegranate seeds in winter for color and a tart counterpoint.
Make the filling up to two days ahead and refrigerate in an airtight container. When ready to serve, warm tortillas and assemble; then bake. If you need fully prepped options, roll taquitos and freeze uncooked on a tray, then transfer to freezer bags. When baking from frozen, increase the oven time by roughly 6–8 minutes. Label bags with dates and instructions to simplify reheating later. Use shallow airtight containers for fridge storage to maintain crispness during quick reheats.
These taquitos are a reliable, adaptable dish that invites creativity—try different cheeses, proteins, or salsas to make them your own. They bring warmth and crunch to the table and are always a welcome sight at casual gatherings.
Warm tortillas briefly under a damp towel or in a skillet to prevent cracking when rolling.
Soften cream cheese to room temperature for easier mixing and a smoother filling.
Brush lightly with oil for even browning; too much oil makes the shells greasy.
Assemble taquitos snugly and place seam-side down to keep them sealed while baking.
Freeze assembled taquitos on a sheet first to prevent sticking before bagging.
This nourishing crispy chicken taquitos recipe is sure to be a staple in your kitchen. Enjoy every moist, high protein slice — it is perfect for breakfast or as a wholesome snack any time.
Yes. You can freeze assembled taquitos on a baking sheet until firm, then transfer to freezer bags. Bake from frozen, adding about 6–8 minutes to the bake time.
Use corn tortillas warmed until pliable to avoid cracking. If you need them gluten-free, choose certified gluten-free corn tortillas.
To keep them crispy when reheating, use an oven or air fryer rather than the microwave. A short broil or toaster oven finish helps restore crunch.
This Crispy Chicken Taquitos recipe makes perfectly juicy, tender, and flavorful steak every time! Serve with potatoes and a side salad for an unforgettable dinner in under 30 minutes.
Preheat the oven to 425°F (220°C). Line a rimmed baking sheet with parchment paper or lightly grease it to prevent sticking and promote even browning.
In a large bowl, mix 2 cups shredded chicken with 4 ounces softened cream cheese, 1/2 cup shredded cheese, 1/4 cup salsa, 1/2 teaspoon each garlic powder, chili powder, and ground cumin, plus salt and pepper to taste. Fold until well combined and adjust moisture if necessary with a teaspoon of stock.
Warm tortillas in the microwave for 20 seconds covered with a damp paper towel or heat briefly in a skillet until pliable to prevent cracking during rolling.
Place 2–3 tablespoons of filling along one side of each tortilla, roll tightly, and place seam-side down on the prepared baking sheet to keep them sealed while baking.
Brush rolled taquitos lightly with oil or spray with cooking spray. Bake at 425°F (220°C) for 15–20 minutes until golden and crisp. For extra browning, broil for 1–2 minutes at the end while watching carefully.
Allow taquitos to rest for 2 minutes after baking, then serve warm with sour cream, guacamole, chopped cilantro, and lime wedges for brightness.
Last Step: Please leave a rating and comment letting us know how you liked this recipe! This helps our business to thrive and continue providing free, high-quality recipes for you.
Leave a comment & rating below or tag
@veralkitchen on social media!
A silky apple butter filling baked in a flaky homemade crust and finished with cinnamon whipped cream and apple butter swirls.
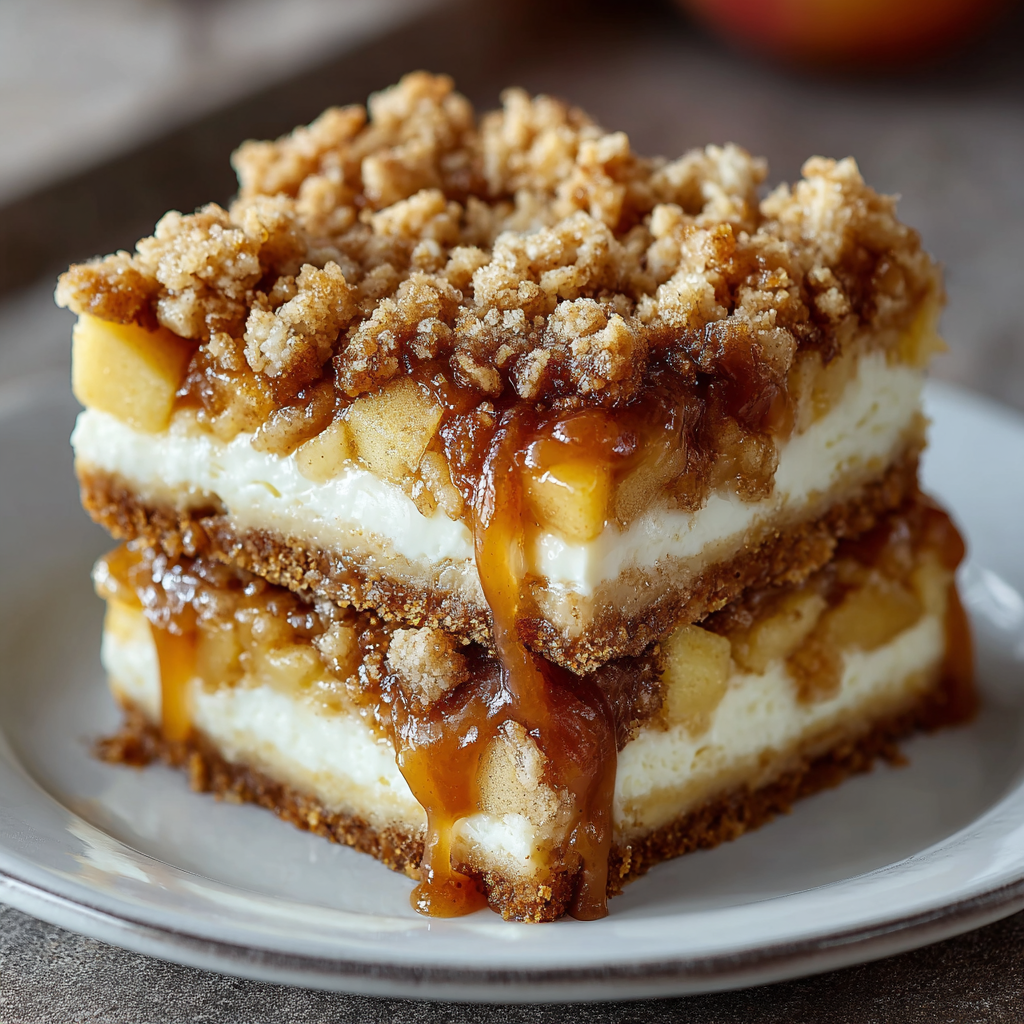
Buttery crust, a creamy cheesecake center, cinnamon-scented apples, and a crunchy oat topping—these bars are a brunch-ready hybrid dessert that’s irresistible.
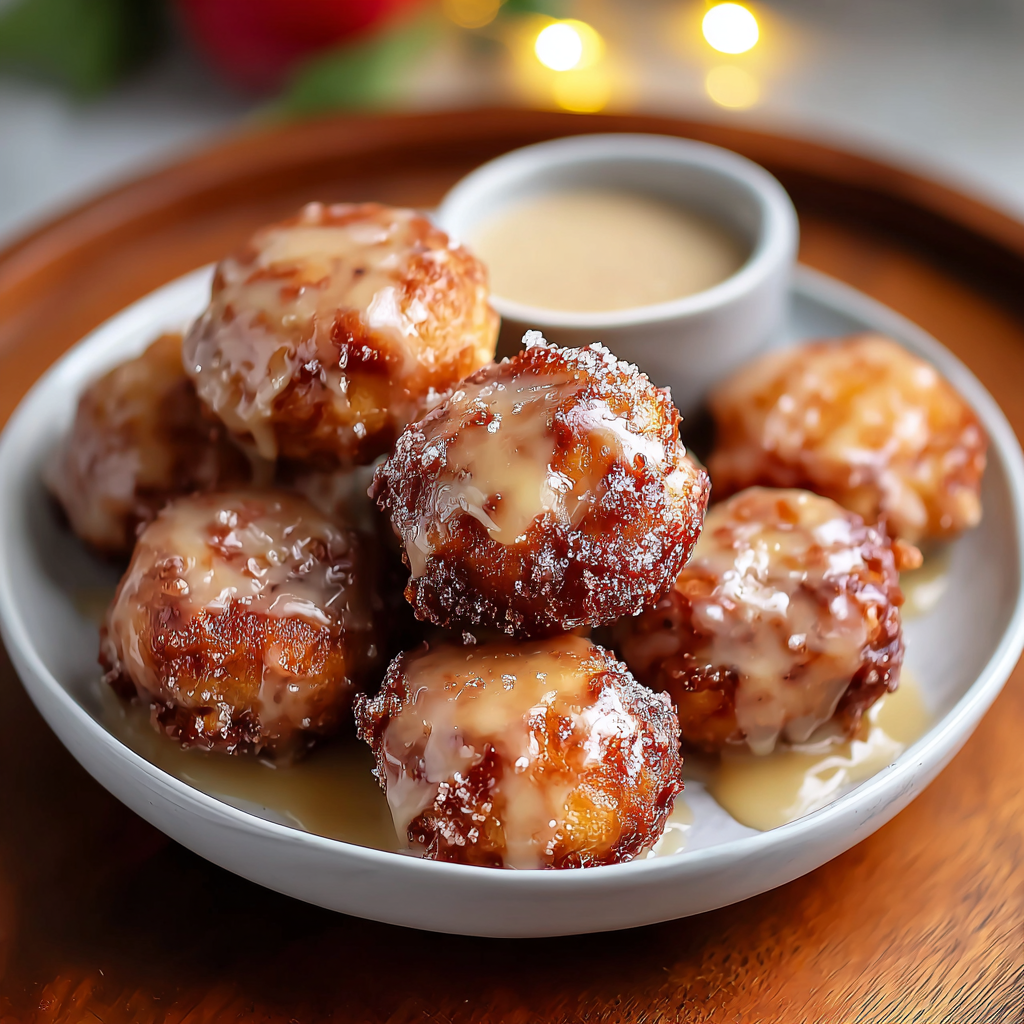
Tiny, tender bites studded with tart apple and warm cinnamon — a quick and delicious treat perfect for breakfast, snacks, or dessert.
Leave a comment & rating below or tag @veralkitchen on social media!
Enjoyed this recipe? Share it with friends and family, and don't forget to leave a review!
This recipe looks amazing! Can't wait to try it.
Comments are stored locally in your browser. Server comments are displayed alongside your local comments.
Quick and easy dinner ideas delivered to your inbox.
